![UrbanSDK_primary_logo_horizontal_white.png]](https://urbansdk-9267502.hs-sites.com/hs-fs/hubfs/UrbanSDK_primary_logo_horizontal_white.png?height=40&name=UrbanSDK_primary_logo_horizontal_white.png)
Part 1: What a Finished Form Looks Like
Before building your own, it helps to know what a completed form includes and why. Here's a complete example: "Request Traffic Calming for Your Street."
A well-built form typically includes:
- A clear title — sets expectations so residents know they're in the right place
- A map — lets constituents pinpoint exactly where their concern is happening, no guesswork needed
- A "Type of Issue" field — categorizes and prioritizes responses
- Timing fields — time of day and day of week the issue occurs
- An open-ended field — space for residents to add context that matters
- Contact info — so you can follow up and show constituents their voices are heard
- Terms and reCAPTCHA — keeps spam out and ensures you're only collecting real feedback
With that in mind, here's how to build one yourself.
Part 2: Build a Form From Scratch
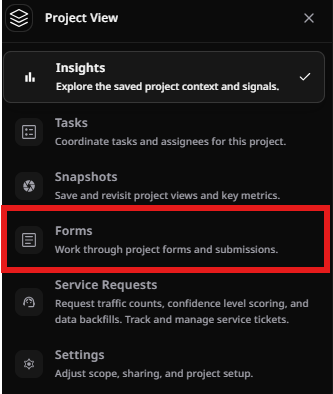
1. Navigate to Forms
From your project, open the Insights module dropdown, then select Forms. This is where you'll create and manage all your public intake forms.

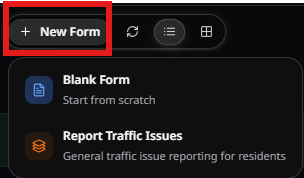
2. Start a New Form
Click + New Form. You can start from a Blank Form or from an existing template (e.g., "Request Traffic Calming for Your Street"). This walkthrough builds one from scratch.

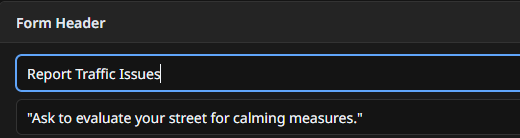
3. Set the Form Header
Give your form a clear title and description in the Form Header field — e.g., "Request Traffic Calming for Your Street" with a description like "Ask to evaluate your street for calming measures."
4. Add the Map Element
Drag in a Map element from the Form Elements panel. Configure:
- The question text (e.g., "Which street or corridor?")
- Link the form to your geographic areas — click Select saved area to open Manage Layers, then choose from your saved Groups/Layers (Polygons, Routes, Calming Focus Areas, Project Boundary, School Zone Monitoring, etc.) so every response is tied to a real location in your workspace, not just a free-text guess.

5. Add "Type of Issue" (Dropdown with Sub)
Add a Dropdown with a sub element to capture the resident's primary concern, organized into categories with subcategories. Example structure used in the template:
Road Safety
- Speeding
- Unsafe/Distracted Driving
- Traffic Control Devices
- Pedestrian or Cyclist Safety
- Parking Issues
- Road Conditions
Traffic Compliance
- Cut-Through Traffic
- Disobeying Turning Restrictions
- Heavy Truck Traffic
- Parking Issues
- Blocking Driveway
Use + Add Subcategory and + Add Option to build out your own categories to match what your agency actually tracks.

6. Add "Time of Day" (Dropdown)
Add a standard Dropdown asking "What time of day do you notice it occurring?" with time-block options, e.g.:
- Overnight (12:00am–3:59am)
- Early Morning (4:00am–6:59am)
- AM Peak (7:00am–9:59am)
- Midday (10:00am–12:59pm)
- Early Afternoon (1:00pm–3:59pm)
- PM Peak (4:00pm–6:59pm)
- Evening (7:00pm–11:59pm)
Toggle Allow multiple selections if residents might notice the issue at more than one time of day.

7. Add "Day of Week" (Dropdown)
Add another Dropdown asking "What days of the week do you notice it occurring?" with Monday through Sunday as options. Same as above, toggle Allow multiple selections if relevant.

8. Add an Open-Ended Field
Add a Text Input element — e.g., "Anything else we should know?" — as an optional field for landmarks, direction of travel, or other details a resident wants to add that don't fit the structured fields.

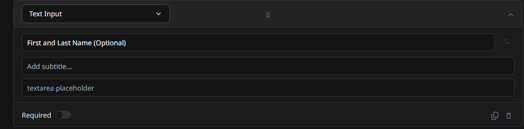
9. Add Contact Info
Add an Email, First and Last Name, Phone Number, etc. field (optional, for follow-up) so you can reach back out to the resident if needed, and can show constituents their concern was heard.

10. Add Terms & Spam Protection
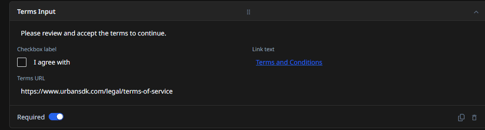
- Add a Terms Input element with a link to your Terms and Conditions, requiring the resident to check "I agree" to continue.
- Enable reCAPTCHA ("I'm not a robot") to filter out spam and keep your submission data clean.
11. Preview the Form
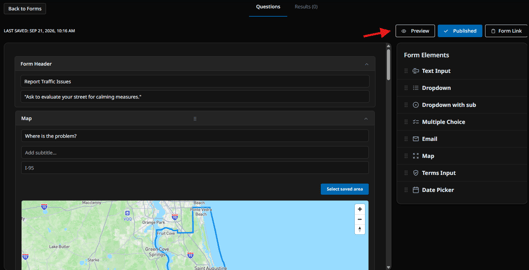
Click Preview to see exactly what a submitter will see. Use the device toggles to check how the form looks on Desktop, Tablet, and Mobile — the layout is responsive across all three.
12. Publish
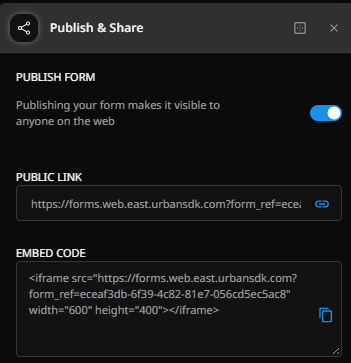
Once you're satisfied with the preview, select the three periods under “Actions” and click Publish & Share to get the form live and ready to share with your community — via your city/county website, social media, or wherever residents will access it. Utilize the Public Link or Embed code to directly embed your new form so all complaints directly route to your Urban SDK workspace.


Available Form Elements
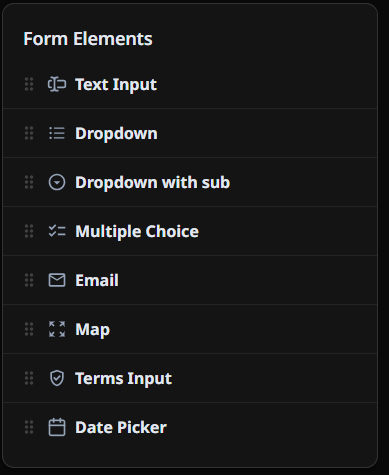
The full set of elements you can add to any form:
|
Element |
Use For |
|
Text Input |
Open-ended free text responses |
|
Dropdown |
Single or multi-select from a flat list of options |
|
Dropdown with sub |
Categorized options with subcategories (e.g., issue type) |
|
Multiple Choice |
Single or multi-select shown as visible choices rather than a dropdown |
|
|
Collecting a contact email |
|
Map |
Location capture, linked to your workspace's saved geographic layers |
|
Terms Input |
Terms and Conditions acceptance checkbox |
|
Date Picker |
Capturing a specific date |
After Launch
- Forms can be edited at any time — field order, categories, and required/optional settings are never locked in permanently.
- On Plus and Pro, each submission can automatically generate a Task, ready for assignment and tracking through to completion.
- On Edge, submissions populate in your workspace for review and reporting, but do not generate Tasks (Tasks are a Plus/Pro capability).